Sunday, July 31, 2016

Atiqa Odho Cosmetics Contouring Powder- Review


Hello beauties!

I am back after a long time sorry for being MIA but I was busy with work and studies and with life basically.
So finally today I am going to post a short review of Atiqa Odho Contouring Powder which is lying there in my draft posts for ages. So without wasting another moment let’s get started:


Packaging:
The powder comes in a regular Atiqa odho plastic case with red lid and a transparent middle part from which the shade is visible. The case has two compartments the upper one for the product and the lower one for sponge. The sponge compartment also has a mirror. The packaging is not very sturdy but the size is perfect to carry it around in your bag. 


My Experience:
The contouring powder comes in three shades walnut, chocolate and coffee. I got mine in chocolate. I bought this powder around 6-7 months ago along with the compact powder. My experience with this contouring powder is very similar to the compact powder which I have already reviewed here.
The powder looks much pigmented in the package but when applied on to the skin it hardly gives any color, it just blends into my skin without giving any contour.
I use this powder for subtle everyday contouring ( sigh! It doesn’t stay for more than 2-3 hours) but the formula is very sheer so first I apply it heavily on to my skin with the sponge and then I use the blending brush to blend. When I want a more contoured/ sculpted face I use cream contouring products and then use this powder to set the cream contour. 
 
Atiqa Odho contouring powder in shade Chocolate- Swatch (heavy layer applied with the sponge)


The Atiqa odho contouring powder is available at daraz.pk and other makeup selling websites for Rs. 300/-. Although I am not very happy with the pigmentation and staying power, I think I will repurchase it because in Karachi’s hot weather it is necessary to set the cream contour with a powder and I haven’t found any contouring powder more affordable than this one as yet so yea! I’ll repurchase it once I finish this one.

That’s it for today… I’ll be back soon till then take care and tell me in the comments about your favorite contouring products.
Bubye…

Saturday, July 9, 2016

DIY Be- You- tiful frame.

Hello beauties!
Its been a while since I did a DIY post but I was so lazy in the past few days that I did not want to try anything but then one day during Ramazan I saw a DIY wall frame made with glitter somewhere on pinterest and I was like I need to try this as soon as possible.

I made a few amendments in the original design as I didn't have all the items needed but I liked how the DIY turned out at the end so here I am sharing my tutorial with you.


Things used:

An empty photo frame

Blank white sheet cut according to the size of frame.

Blank sheet (any color of your choice, I used turquoise to match the theme of my room).

UHU all purpose adhesive (or any glue)

Glitter (any color)

Pen with golden ink.

A pair of Scissors to cut the paper.

Pencil

Scale


Method:
I wrote the words Be- You- tiful on a white sheet in the way I wanted them on my frame.


Then I traced the words on the turquoise paper sheet and wrote Be and TIFUL with the gloden pen.


Then I wrote the word YOU with the UHU tube and sprinkled the glitter over it and then let it dry


After its completely dry I put the sheet in the frame and its done.


I hope you like this DIY its super fun and easy to make.

That's it for today I'll be back soon till then take care..

Bubye

Sunday, June 26, 2016

Trends to try this eid

Hello beauties!
I am back and today I am going to do talk about some fashion trends. Eid is near and we all know selecting a perfect outfit for eid is a really hectic and difficult task, we go through dozens of websites and shops to look for latest trends and colors to find one perfect outfit but now you don't need to do this because I have done this for you and now I am going to share with you a few trends in women's clothing that you can try for your eid outfit.
Personally for eid I prefer a traditional outfit but nothing too fancy so that I can wear it casually after eid that’s why I prefer lighter fabrics such as lawn with more detailing in cuts and lesser embroidery as they are easy to carry and are summer appropriate and that's why I am sharing such trends only, nothing too fancy. So let's get started:
Cut out sleeves:
A part is cut from the upper part of the sleeve. It can be in any shape and whatever size you want. You can get some ideas from here:


Puffy and voluminous sleeves are very much in trend not only in Pakistan but internationally as well. These are a few types of voluminous sleeves you can try.

Bell sleeves: These are the sleeves made in the shape of a bell i.e. the upper half is fitted with a flared bottom half. This trend is t not very popular in Pakistan yet but some designers have made these bell sleeves in their dresses so this trend is getting popular very soon girls.

Anaya by Kiran Chaudhry


Batwing sleeves:


It’s a long wide sleeve with a deep armhole, tapering towards the waist. These sleeves not only look chic but are also summer appropriate.


Ayesha Farooq Hashwani


Balloon sleeves:
These are the sleeves fitted from top and fuller at the bottom and are gathered into a cuff.

Tulip pants:

From high end to high street tulip pants are all the rage these days. Pearl studded tulip shalwars are very popular and are my favorite.


ayesha somaya
Belted dupattas and shirts:
Just put your dupatta on one shoulder and loosely tie it around your waist with a thin belt it looks super stylish.


Ethnic by outfitters
Belted voluminous shirts are also very common.
Lahori ink
Front open slits: If you want a dress that will make you look flatter or taller go for shirts with front open slits.


Tena Durrani

That's it for today...
I hope you found this post helpful... I'll be back soon till then take care and tell me in the comments which of the above trends you like most. bubyee

Monday, June 20, 2016

Freeman Facial Purifying Acai Clay Mask

Hello beauties!

I am back with another post and today it's going to be a face mask review. I have already shared with you that when it comes to face masks I rely on freemans. Over the years I have tried many of their masks and have also reviewd two on my blog which you can check out here and here today I am going to talk about Freeman's Acai clay mask.
Product claim:
A quick fix for dulling skin, powered by an 8-antioxidant blend of Acai, Blueberry, Cranberry, Goji, Mango, Mangosteen, Noni, and Pomegranate to neutralize environmental damage. Super oil-absorbent clays draw impurities from skin and clean out clogged pores. Perfect for all skin types.
Ingredients:
It contains many fruits like Acai Goji berry, cranberry, blueberry mango and pomegranate extracts. All these fruits got my attention and I immediately bought it.
Packaging:
The mask comes in a regular 175 ml purple plastic tube. The color of packaging was another reason I was attracted towards this mask.

Fragrance and appearance:
Its smell remind me of bubblegums. The smell is quite refreshing and pleasant actually and it stays there until the mask is washed off. The color of the mask is mint green/blue.

Use:
As per instructions I use it twice a week. I just apply it all over my face focusing more on my nose and its surrounding areas as that's where my pores are more likely to be clogged. The consistency of the mask is neither thin nor very thick so it spreads easily unlike most clay masks which are very thick and difficult to spread.

My experience:
It takes around 20-25 minutes to completely dry and I just wash it off with normal tap water (you can use warm water if you want). 
The first time I used it I was really happy with the result because it really made my skin more alive. In terms of evening out the skin tone it worked just like the chocolate and strawberry mask which is my all time favorite but it is not as moisturizing as the other one so I need to moisturize my face after using this and that is why I think it would not be very good for people with dry skin especially in winters.
For summers, this mask is perfect for me as I usually get two toned and tanned skin in summers and it really helps in reducing the tan and evening out the skin tone. 
As for its claim for drawing out impurities and cleaning the pores, I think it lives up to its claim as whenever I use it I feel my skin extra clean and soft. Overall I am happy with this product and would recommend this to everyone who do not have very dry skin.

Price and availability:
It is easily available in all supermarkets and pharmacies and online. The price ranges between Rs.350-400/-

That's it for today I hope you found this post useful...
I'll be back soon till then take care...
Bubyee...


Sunday, June 19, 2016

Makeup kit for beginners- Part IV

Hello beauties!

I am back with the forth and the last post in my beginners' makeup kit series. Yea the series was supposed to end yesterday but then I realized I have talked about concealers, blush and lipstick palettes but I haven't discussed any options for people who want to buy individual products instead of palettes and that's why I decided to do this post in which I am going to share a few individual products in these categories. So let's get started...

Concealer:
  • Maybelline age rewind concealer
  • Maybelline fit me concealer
  • LA girl pro conceal

Lipsticks:


Lipgloss:


Blush on:

  • Maybelline dream bouncy blush
  • Misslyn compact blush
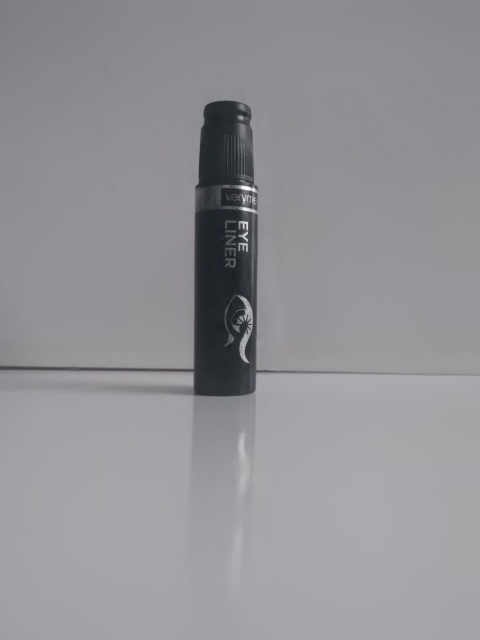
  • Oriflame very me cherry my cheeks blush
  • Makeup revolution's blushing hearts blusher

I have used most of the products mentioned above and I have read good reviews about those which I haven't used but still I recommend that you do your research before buying any of these products.


That's it for today I hope you found this post helpful...
I"ll be back soon till then take care and tell me in the comments which are your favorite lipsticks and blush ons.
Bubyee...


Saturday, June 18, 2016

Makeup kit for beginners- Part III

Hello beauties!

I am back with the third post in my beginners' makeup kit series and today I am going to talk about the last two products in my list which you can find here and these two products are mascara and eyeliner.
So lets start with the mascara:

Mascara:
Mascara is that one game changing product that can really change your look.  Your choice of mascara would depend on your preference for length and volume. There are different types of mascaras with differences in formulas and brushes. Before moving on to the list of mascaras I want to share a few points about mascara brushes with you which may help you in choosing a mascara.

  • If you have short lashes choose a mascara with a short wand and thick bristles as it will get close to your eyes and will easily grab each and every little lash.
  • If you already have thick lashes and now want some length and definition go for a mascara with a comb like brush as the more space there is between bristles, the better it will be at separating and defining lashes. 
  • If you want volume in your lashes then go for a mascara with densely packed bristles. 
  • Curved brushes are better at curling the lashes than straight brushes.
Now, here's a list of some good and affordable mascaras:

  • Maybelline colossal volume express mascara.
  • Essence get big lashes volume boost mascara
  • Maybelline lash sensational mascara
  • Maybelline great lash mascara
  • L'oreal Miss Manga Lash Lengthening Mascara
Eyeliners:

Gel eyeliner:
  • Maybelline eye studio lasting drama gel liner
  • Essence Gel eye pencil water proof.
  • Catrice eye liner gel
Liquid eyeliners:
Pencil eyeliners:

I have used most of the products mentioned above and I have read good reviews about those which I haven't used but still I recommend that you do your research before buying any of these products.
That's it for today I hope you found this post helpful...
I"ll be back soon till then take care and tell me in the comments which are your favorite mascaras and eyeliners.
Bubyee...


Friday, June 17, 2016

Makeup kit for beginners- Part-II

Hello beauties!

I am back with the second post in my beginners’ makeup kit series and today I am going to talk about the face makeup products i.e. Foundation and the setting powders.
If you have not read the first post you can check it out here. Now lets get started with the foundation.

Foundation:
We use foundation to even out the complexion and to hide any minor imperfections on our skin. There are dozens of types of foundations available so choosing a perfect foundation is a difficult task but I hope these few points will help you in choosing your perfect foundation.

Before buying a foundation these points must be considered:

The coverage you need: 

The foundations come with light, medium and heavy coverage.
How much coverage you want would depend on the condition of your skin and on time and occasion where you want to wear the foundation. If you have any blemishes for e.g. acne scars that need to be covered you can go for heavy coverage foundation otherwise choose a light to medium coverage foundation.
 Also, wearing a full coverage foundation every day during the daytime is not a good idea as they usually make your makeup look cakey so for everyday use its better to go for a light to medium coverage foundation.
If you are young or have naturally clear skin with no uneven skin tones I would suggest that you start with a BB bream or a tinted moisturizer. Usually BB creams have limited shades and they adjust to the skin tone when applied so it’s easier to choose the shade of BB cream as compared to a foundation
Your skin type:

Your skin type would play an important role in how a foundation looks on your face. If you have oily skin it’s better to use a water based or oil free foundation. Similarly for dry skin go for an oil based foundation but in any case don’t forget to moisturize your face before applying foundation.

Foundations come in powder, liquid, stick as well as in mousse forms. Usually powder foundations work best for oily skin and stick and liquid foundations work for dry to normal and combination skin but that is not necessary it solely depends on the formula of foundation. I prefer liquid or mousse foundations as they are easier to apply and blend.
These are some good budget foundation options:

For light to medium coverage:

For heavy coverage:
  • Kryolan TV paint stick
  • Luscious camera stick full coverage foundation

BB creams:

  • Maybelline 8 in 1 dream fresh BB cream
  • Garnier BB cream miracle skin
  • Oriflame skin dream BB cream

Before buying a foundation consider your skin tone as well as its undertones. I suggest not to order a foundation online if you are buying it for the first time, instead go to the store so you can try the product on your actual skin. Also, the assistant there would help you with finding your right shade.

So that’s all about foundations now let’s move on to the setting powder.

Setting Powder:
If you are using a powder foundation you don’t need to set it with powder but for other types of foundations (and for concealer) setting powder is a must.
You can use loose powder when you do makeup at home but always carry a compact powder in your bag for touch ups during the day.
Again, choose the right shade as per your skin tone and never go overboard with powder because dewy makeup looks more natural as compared to completely matte makeup.

Some suggestions for setting powder:


I have used most of the products mentioned above and I have read good reviews about those which I haven't used but still I recommend that you do your research before buying any of these products.
That's it for today I hope you found this post helpful...
I"ll be back soon till then take care and tell me in the comments which are your favorite foundation and setting powder.
Bubyee...